

I've been working for a year or so trying to convert my tank from metal halide to LED and I thought I would share my progress as I go.
Last Fall I started a DIY project building an Arduino controller. I knew I wanted to be able to dim the LEDs for sunrise/sunset, but I also wanted to be able to control the fans on the heatsink, have a dimmable moonlight that follows the moon cycles, and be able to control a seperate frag or fuge tank that would be running in sync or opposite of my main tank. The frag tank would also be a good place to accimilate new corals to the LEDs without having to dim my main tank all over again. If I wasn't able to do this, then there would be no point in switching over to LED since that is one of the main benefits. After a few months of learning electronics and programming an Arduino I'm about 90% finished with the controller. You can see some of my progress here:
http://www.carolinafishtalk.com/forum/diy-section/30981-my-aurdino-led-controller-build.html
I never build a fully functional PCB for the controller because I never knew how it would be mounted or displayed on the tank. That's where the MakersLED heatsink came into play, but more on that later.
After knowing that I could build a controller, I started on a small LED setup for my frag tank. My frag area is half of my 20H sump, so it didn't need to be a big setup. I opted with 3 Cree Cool White LEDs and 4 Cree Royal Blue LEDs powered by a Meanwell ELN-60-27P driver. Once I had all the LEDs setup on the small 4.25" x 4" heatsink I was able to connect it to the controller to test everything out. Luckily everything worked great! It has been running on my frag tank for the past 6 months or so and my sps, ricordia, and zoas are loving it.
Now that I knew I could do it, I started designing the LED setup for the main tank.
http://www.carolinafishtalk.com/forum/diy-section/39098-check-my-led-design-my-40-breeder.html
I finally decided to go with:
(1) 24" MakersLED heatsink
(3) XM-L Cool White
(3) XM-L Natural White
(2) Luxeon Violet UV
(3) XP-E Red
(24) XT-E Royal Blue
The XM-L will be run from an ELN-60-27P driver @ 2.3A
The Violet and Red will be run from an ELN-60-27P driver @ 700mA
The Royal Blues will be run from 2 ELN-60-48P drivers @ 1.3A
All LEDs will have 80° optics.
The red, violet and white will be run off of one channel from the controller with the blue running on the other channel. This will give me the ability to control the amount of blue or white in the tank.
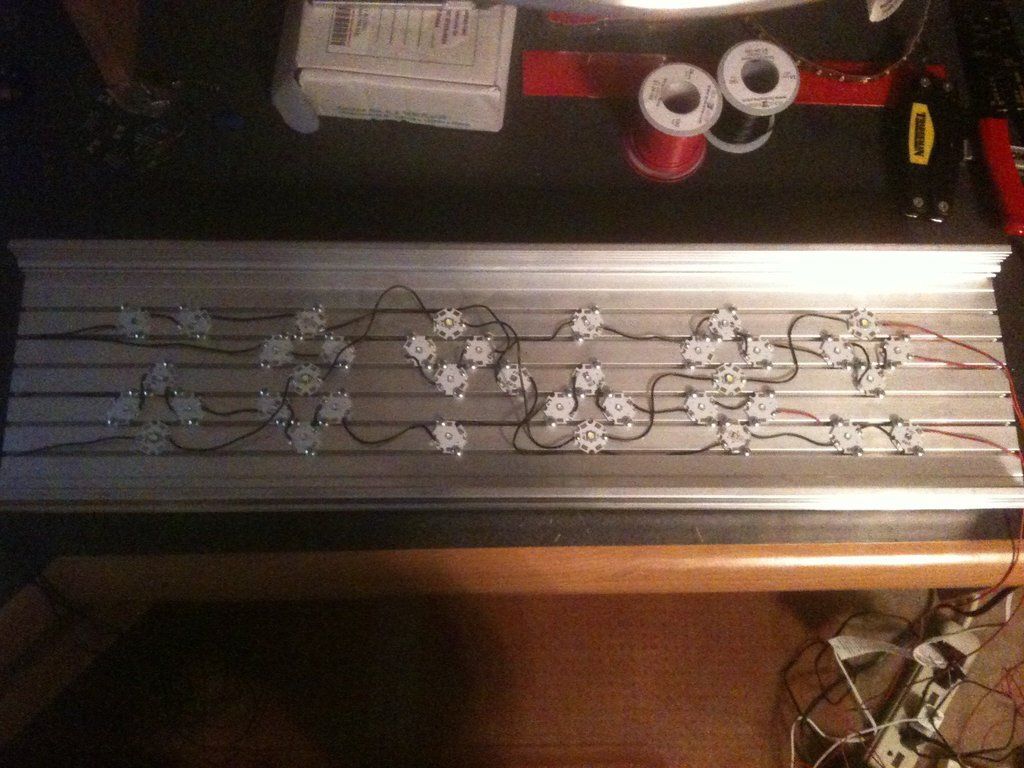
Since I went with the MakersLED heatsink, I didn't have to do the standard block layout of the LEDs. You can easily position them pretty much anywhere on the heatsink so I had a little more freedom. I decided to make some groups of LEDs so every white LED will be surrounded by at least 3 royal blue LEDs. This should prevent the spotlighting effect some people get.
I don't have a SketchUp image of the new layout, but you can see the LEDs here after I finished all my soldering.
![Image]()
The positioning and soldering took quite a while, but I'm pretty happy with how it all came out. After I finished the layout and soldering I used a hot glue gun to organize the wires a little better. That's when I found out that I'm much better with a soldering iron than a hot glue gun! That stuff gets everywhere! It's a good thing I started with the wires instead of the optics or I might have had to replace a few LEDs!
![Image]()
![Image]()
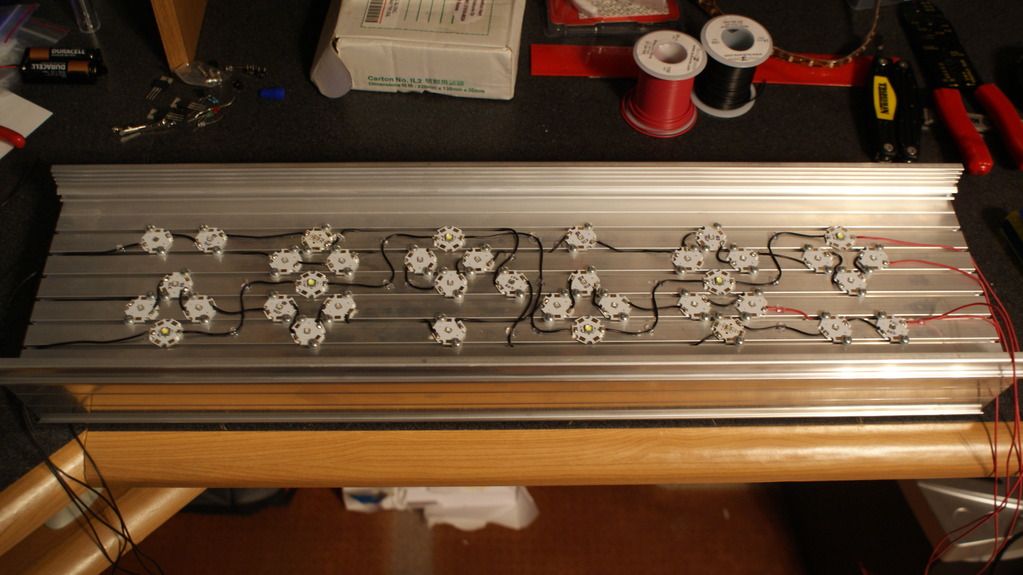
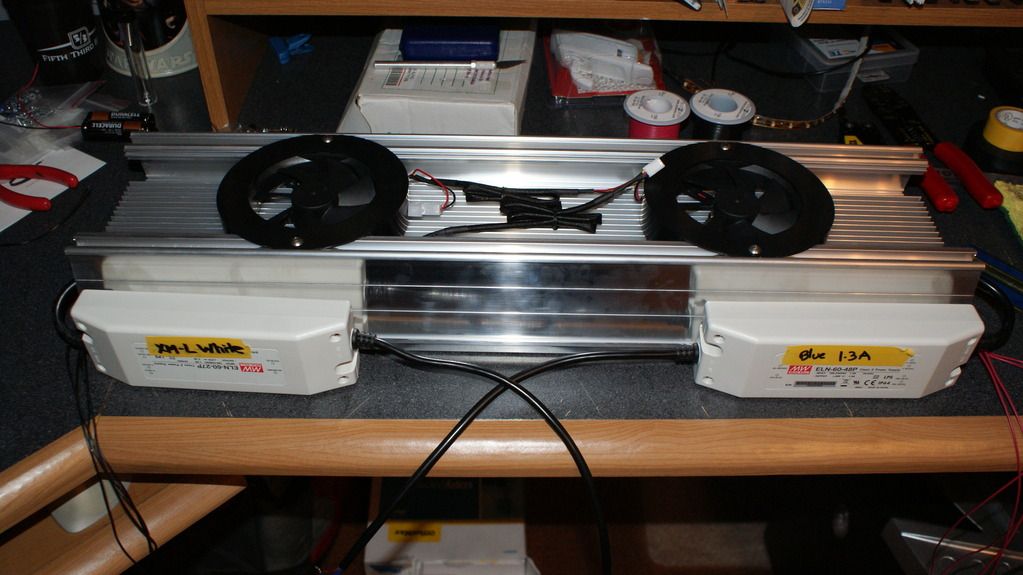
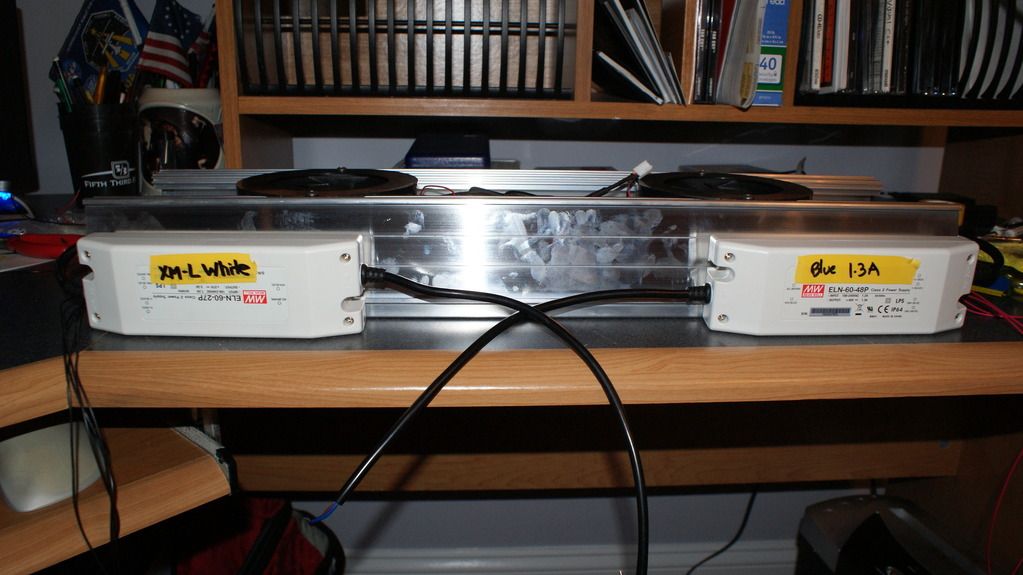
Then I positioned the fans on the top and checked the location of the drivers. There will be 2 mounted on the front and back of the heatsink.
![Image]()
![Image]()
I plan to mount the controller between the fans. The "brains" of the controller will sit on the very top of the heatsink between the fans and the display and controls will be on the front between the drivers. This should give me good access to be able to check the status of the lights and change any settings if I need to. One of the best things I like about this heatsink is that it gives me the option to keep most of the wiring all within the heatsink. There will still be a few wires running to it for the controller, but if I wanted the only wires I would need to come to the LED setup would be DC and AC power. It makes for a really clean setup.
That's all I have for now. The next steps are to glue the optics and start planning the PCB and enclosure for the controller. Hopefully in a few weeks I'll have this thing up and running!
I'll be sure to post updates as I make them.
Last Fall I started a DIY project building an Arduino controller. I knew I wanted to be able to dim the LEDs for sunrise/sunset, but I also wanted to be able to control the fans on the heatsink, have a dimmable moonlight that follows the moon cycles, and be able to control a seperate frag or fuge tank that would be running in sync or opposite of my main tank. The frag tank would also be a good place to accimilate new corals to the LEDs without having to dim my main tank all over again. If I wasn't able to do this, then there would be no point in switching over to LED since that is one of the main benefits. After a few months of learning electronics and programming an Arduino I'm about 90% finished with the controller. You can see some of my progress here:
http://www.carolinafishtalk.com/forum/diy-section/30981-my-aurdino-led-controller-build.html
I never build a fully functional PCB for the controller because I never knew how it would be mounted or displayed on the tank. That's where the MakersLED heatsink came into play, but more on that later.
After knowing that I could build a controller, I started on a small LED setup for my frag tank. My frag area is half of my 20H sump, so it didn't need to be a big setup. I opted with 3 Cree Cool White LEDs and 4 Cree Royal Blue LEDs powered by a Meanwell ELN-60-27P driver. Once I had all the LEDs setup on the small 4.25" x 4" heatsink I was able to connect it to the controller to test everything out. Luckily everything worked great! It has been running on my frag tank for the past 6 months or so and my sps, ricordia, and zoas are loving it.
Now that I knew I could do it, I started designing the LED setup for the main tank.
http://www.carolinafishtalk.com/forum/diy-section/39098-check-my-led-design-my-40-breeder.html
I finally decided to go with:
(1) 24" MakersLED heatsink
(3) XM-L Cool White
(3) XM-L Natural White
(2) Luxeon Violet UV
(3) XP-E Red
(24) XT-E Royal Blue
The XM-L will be run from an ELN-60-27P driver @ 2.3A
The Violet and Red will be run from an ELN-60-27P driver @ 700mA
The Royal Blues will be run from 2 ELN-60-48P drivers @ 1.3A
All LEDs will have 80° optics.
The red, violet and white will be run off of one channel from the controller with the blue running on the other channel. This will give me the ability to control the amount of blue or white in the tank.
Since I went with the MakersLED heatsink, I didn't have to do the standard block layout of the LEDs. You can easily position them pretty much anywhere on the heatsink so I had a little more freedom. I decided to make some groups of LEDs so every white LED will be surrounded by at least 3 royal blue LEDs. This should prevent the spotlighting effect some people get.
I don't have a SketchUp image of the new layout, but you can see the LEDs here after I finished all my soldering.
The positioning and soldering took quite a while, but I'm pretty happy with how it all came out. After I finished the layout and soldering I used a hot glue gun to organize the wires a little better. That's when I found out that I'm much better with a soldering iron than a hot glue gun! That stuff gets everywhere!
It's a good thing I started with the wires instead of the optics or I might have had to replace a few LEDs!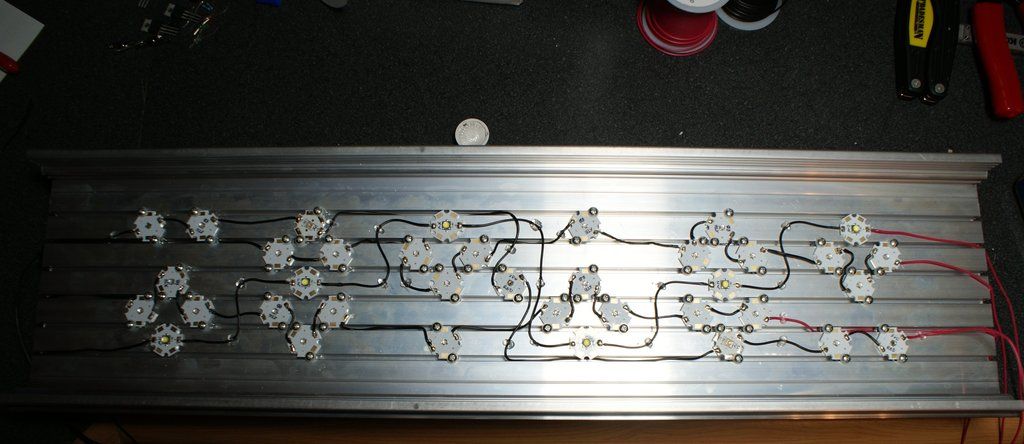
Then I positioned the fans on the top and checked the location of the drivers. There will be 2 mounted on the front and back of the heatsink.
I plan to mount the controller between the fans. The "brains" of the controller will sit on the very top of the heatsink between the fans and the display and controls will be on the front between the drivers. This should give me good access to be able to check the status of the lights and change any settings if I need to. One of the best things I like about this heatsink is that it gives me the option to keep most of the wiring all within the heatsink. There will still be a few wires running to it for the controller, but if I wanted the only wires I would need to come to the LED setup would be DC and AC power. It makes for a really clean setup.
That's all I have for now. The next steps are to glue the optics and start planning the PCB and enclosure for the controller. Hopefully in a few weeks I'll have this thing up and running!
I'll be sure to post updates as I make them.


